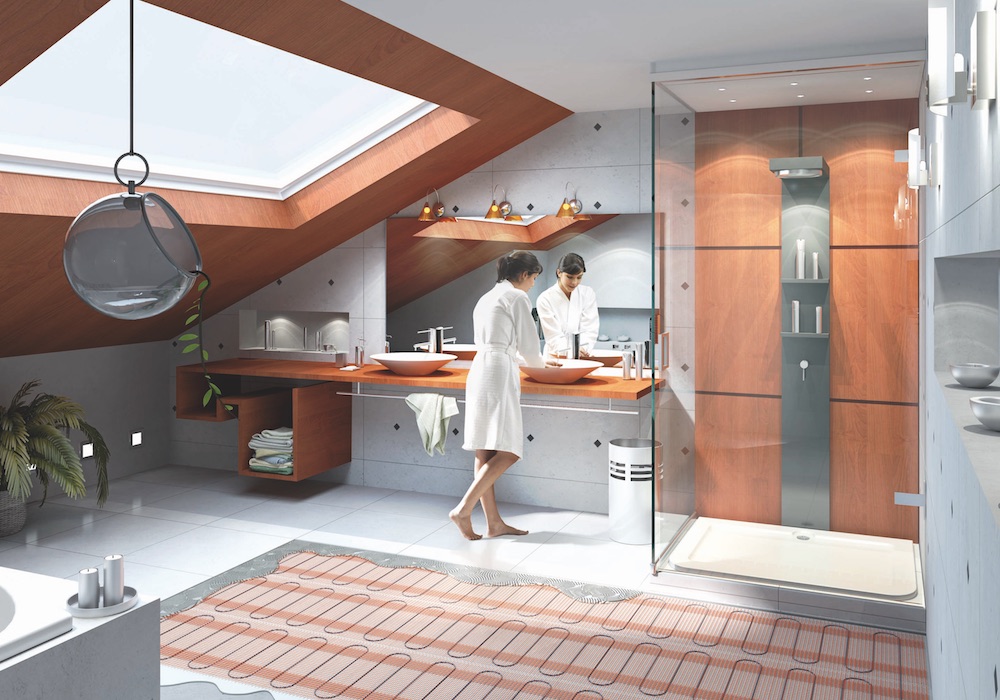
Everything you Need to Know About Underfloor Heating
An increasingly popular heating solution for the bathroom, underfloor heating has a number of benefits. From saving on wall space to keeping you cosy and warm underfoot, there’s no wonder it has become the go-to choice for bathroom heating. Here, with the help of our CTD experts, we take a look at the key reasons why it should be considered, in addition to a step-by-step installation guide, providing you with everything you need to know when it comes to underfloor heating in the bathroom.
Why choose underfloor heating?
As a homeowner, the first thing you think of when it comes to underfloor heating is how nice it actually feels, especially compared to stepping onto a cold, chilled tiled floor. The luxury of the warmth underfoot is something that is very sought after and often one of the key decision-making factors. Underfloor heating also offers a number of practical benefits - one of the key selling points is that it has lower running costs than other heat sources with easy temperature control. An energy efficient heating choice, opting for underfloor heating might be an investment initially but in the long term it should save costs on energy bills. From a visual and practical point of view, underfloor heating is a space saver as your walls don’t need to be taken up by towel heaters or radiators; it’s the ideal choice for more sleek, minimalist spaces. Underfloor heating is clean and safe and is ideal for wetrooms because wet floors and bath mats will dry much faster meaning there is much less chance of slipping or risk of mildew or mites.

Things to consider when planning and installing underfloor heating
There are two types of underfloor heating systems: wet (hydronic) and dry (electric). The difference between the two is that the wet system will provide heat through warm water via pipes, whereas dry systems use mats featuring electric coils. Electric is easier to install and quicker when renovating a bathroom or kitchen and means that you would not need to completely pull up flooring like you would need to for wet systems. At CTD, we provide two different types of underfloor electrical heating systems to choose from:
- Decoupling matting systems: These are used on floors that are exposed to movement (the uncoupling mat provided with these systems prevents cracks in tiles or grout).
- Heating mats: These are self-adhesive mats which tend to be easier and faster to install (with a built-in wire combined into a mat).
Important step before buying: measure the area you want the heat to run through to make sure you buy the right sized roll.
Efficiency & running costs of underfloor heating
Depending on your energy prices, underfloor heating systems may cost more to run but they tend to run less often since it heats up the floor evenly without overheating in minutes. If used correctly, electrical underfloor heating can save you up to 25% on energy bills and uses 15-40% less energy than traditional radiators. All of our heating systems at CTD are compatible with our recommended thermostats to provide full control of your heating. Some thermostats are built with automatic sensor modes and smart technology which controls your heating, or you can take full control of your temperatures through apps. All of our underfloor heating systems also come with warranties of up to 20 years.

Underfloor Heating Installation Guide
All tiles are suitable with underfloor heating with the use of correct flexible adhesive and grout. We recommend always asking a professional which underfloor heating system will be most suitable and efficient to go with your chosen floor type.
Step 1: Preparing subfloors for underfloor heating
- Underfloor heating systems can be fitted directly onto any existing floor such as wood, plaster or concrete, if sound and movement-free.
- You must make sure the area is clean and dirt free before starting.
- We highly recommend laying an insulating board down first to prevent heat loss through floors. Simply measure and cut the boards using a craft knife or saw, lay them in a staggered position fixing them with flexible adhesive and make sure all gaps and boards are secured with joint tape to prevent any movement.
Step 2: Laying the underfloor matting system
Top tip: Plan where to install your underfloor heating before you start and don’t run it underneath baths, toilets or furniture units.
Self-adhesive mats:
- Roll out the first section to the length of the area, pushing the self-adhesive side on the floor so that it sticks down.
- Keep a 50mm gap between walls or objects and the matt to allow for expansion joints.
- Use scissors to cut the heating mat (but be careful not to cut the cable!), fold over keeping it aligned and roll it down the opposite direction. Continue until you’ve covered the entire area.
- We would highly recommend asking an electrician to fit the final connection to the thermostat.
Decoupling matting system:
- Roll out the mat to the desired length, keeping a 10mm gap between walls or objects to prevent a sound bridge from being formed and to allow for expansion joints.
- Cut the matting roll with a utility knife to size, you can easily cut around any shapes or obstacles this way too.
- Check your subfloor is clean and then spread the flexible adhesive on the subfloor using a notched trowel but use the flat side first to get even coverage.
- Use the notched trowel side in the same direction across the adhesive.
- Lay the mat over the adhesive and compress it to ensure it will fully stick. Continue this process until fully covered making sure the dots line up (this is important as there will be wires running through).
- After the underfloor heating is installed you are then ready to lay flexible adhesive and tile.
